
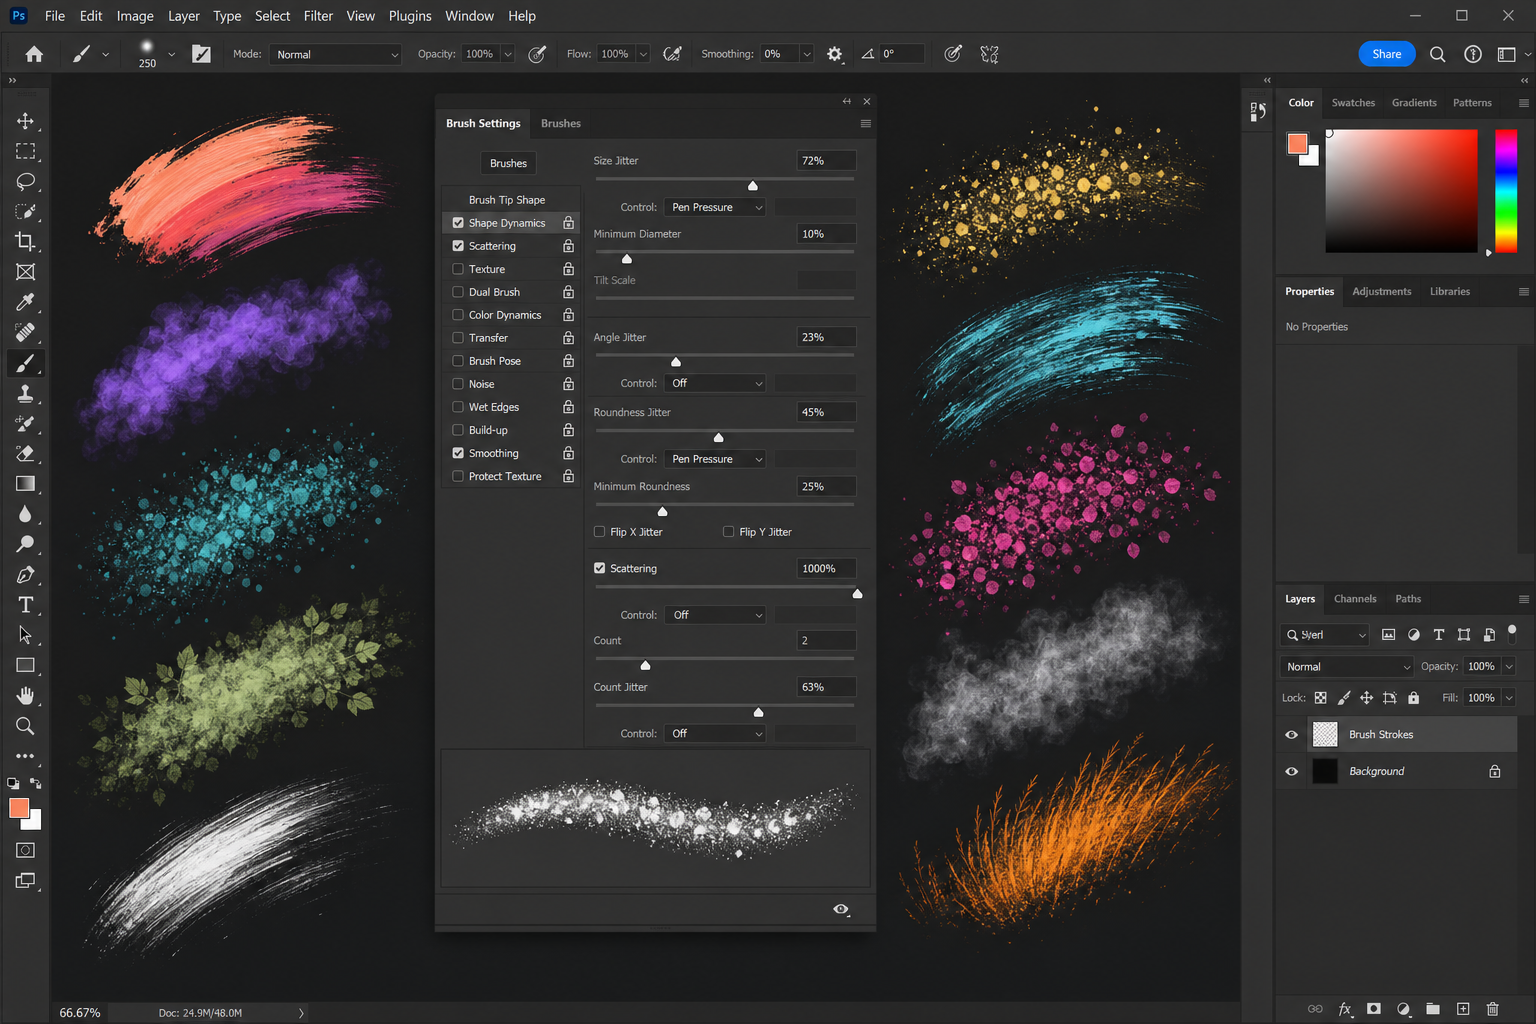
Photoshop brush settings are the secret engine behind every convincing digital painting, flawless retouch, and jaw-dropping special effect you’ve ever admired. Whether you want to replicate the texture of watercolour paper, scatter stars across a night sky, or build a perfectly pressure-sensitive inking nib, the Brush Settings panel gives you the controls to do exactly that — if you know where to look. This guide walks you through creating custom Photoshop brushes from scratch, finding high-quality packs online, and dialling in every advanced option to supercharge your workflow.
What Is the Photoshop Brush Settings Panel?
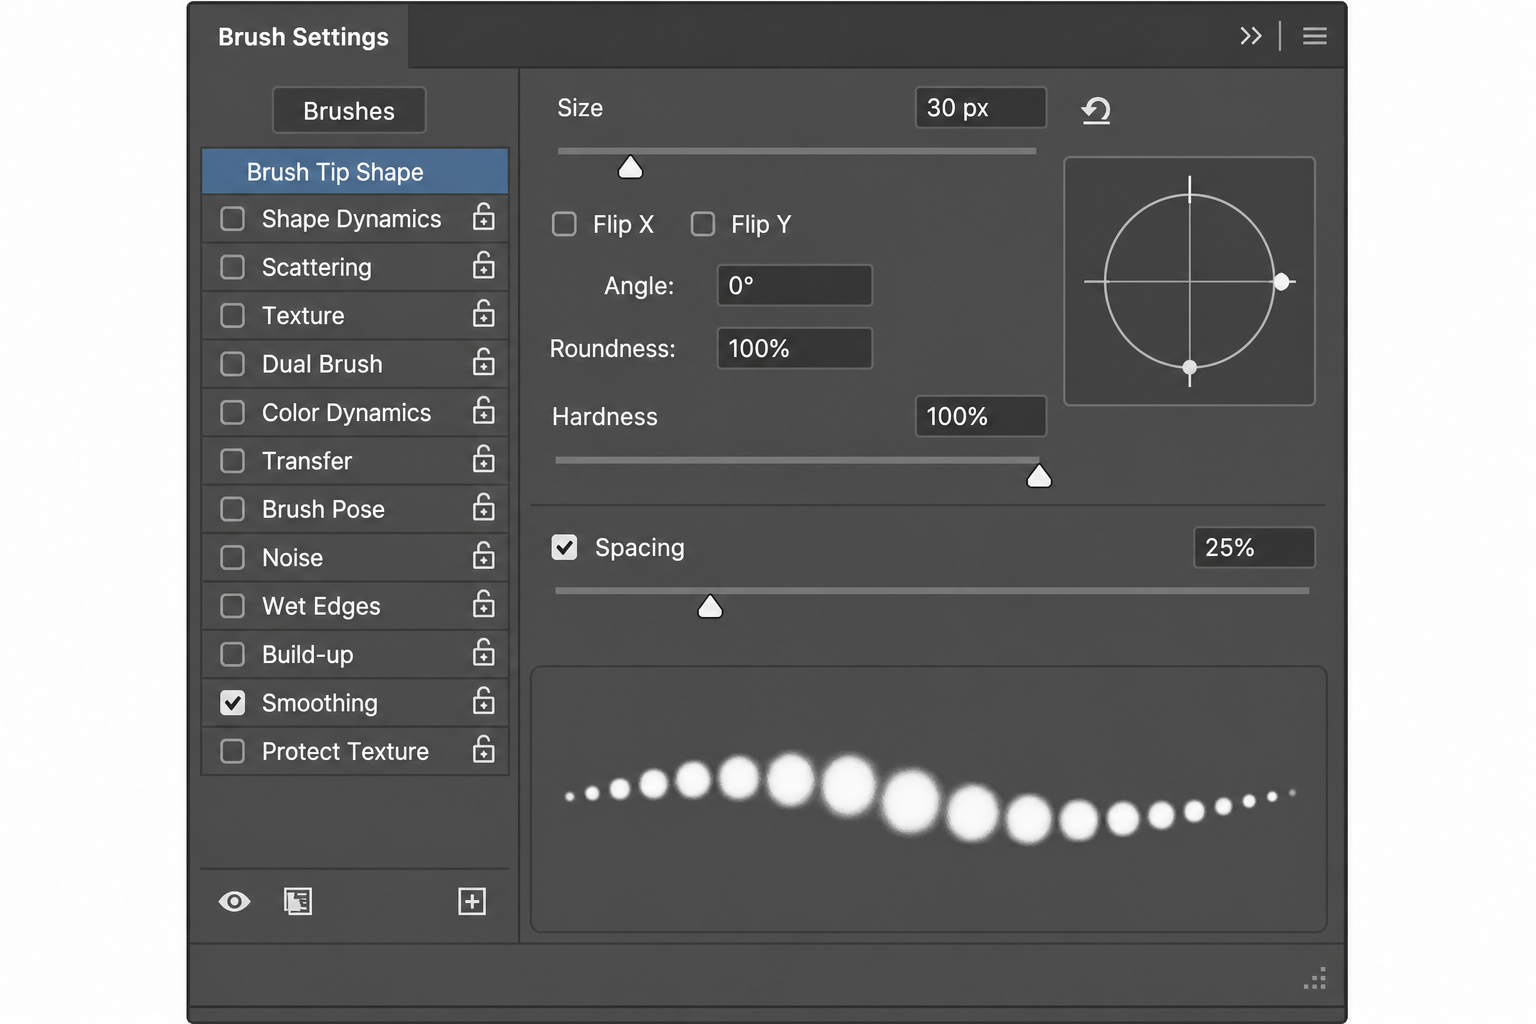
The Brush Settings panel (Window → Brush Settings, or F5) is the control room for every brush in Photoshop. It replaces the old Brushes palette and exposes every parameter that governs how a stroke behaves: tip shape, spacing, dynamics, texture mapping, and more. Adobe’s official Brush Settings documentation confirms the panel is available for the Brush, Pencil, Eraser, Clone Stamp, and several other tools — so what you learn here applies across your entire toolkit.
The panel is split into two zones: the left column lists every category (Brush Tip Shape, Shape Dynamics, Scattering, Texture, Dual Brush, Color Dynamics, Transfer, Brush Pose, Noise, Wet Edges, Build-up, Smoothing, Protect Texture). The right side shows the controls for whichever category is highlighted. Tick the checkbox to activate a category; click its name to open its controls.
How to Create Custom Photoshop Brushes from Scratch
Creating a custom brush is simpler than most artists expect, and it gives you a tip that no preset library can replicate.
- Design your tip shape. Work in greyscale on a white canvas. Black areas become fully opaque paint; grey areas become semi-transparent. Keep the canvas under 2,500 × 2,500 px for best performance.
- Select the shape. Use the Rectangular Marquee tool to draw a selection around your artwork.
- Define the preset. Go to Edit → Define Brush Preset, name your brush, and click OK. It appears instantly at the bottom of your brush list.
- Refine in the panel. Open Brush Settings and tweak spacing, angle jitter, and any dynamics before saving a final preset with the floppy-disk icon.
You can make highly specialised tips — leaf clusters, halftone dots, hand-drawn hatching lines, paint splatter — all with this four-step process. The key is that any pixel graphic can become a brush tip, including selections from photos.
Where to Download High-Quality Brush Packs
Brush customization starts with a great tip, and the internet is full of free and paid packs. The most reputable sources include:
- Adobe Discover / Creative Cloud Libraries — Adobe curates thousands of free brushes accessible directly inside Photoshop via the Cloud Libraries panel.
- Brusheezy — One of the oldest community-driven brush repositories, with well-tagged free and premium packs.
- DeviantArt — An enormous archive of community-created brushes, especially popular for concept art and manga-style sets.
- Kyle T. Webster brushes — A legendary brush artist whose 1,000+ brush mega-pack ships free with every Creative Cloud subscription since 2017.
- Envato Elements / Creative Market — Paid marketplaces with professional-grade sets for watercolour, oil, ink, and speciality effects.
Always install brushes via Edit → Presets → Preset Manager or by double-clicking an .abr file while Photoshop is open. Photoshop CC 2020 and later also supports drag-and-drop straight onto the canvas.
Shape Dynamics: Control How Your Brush Changes Mid-Stroke
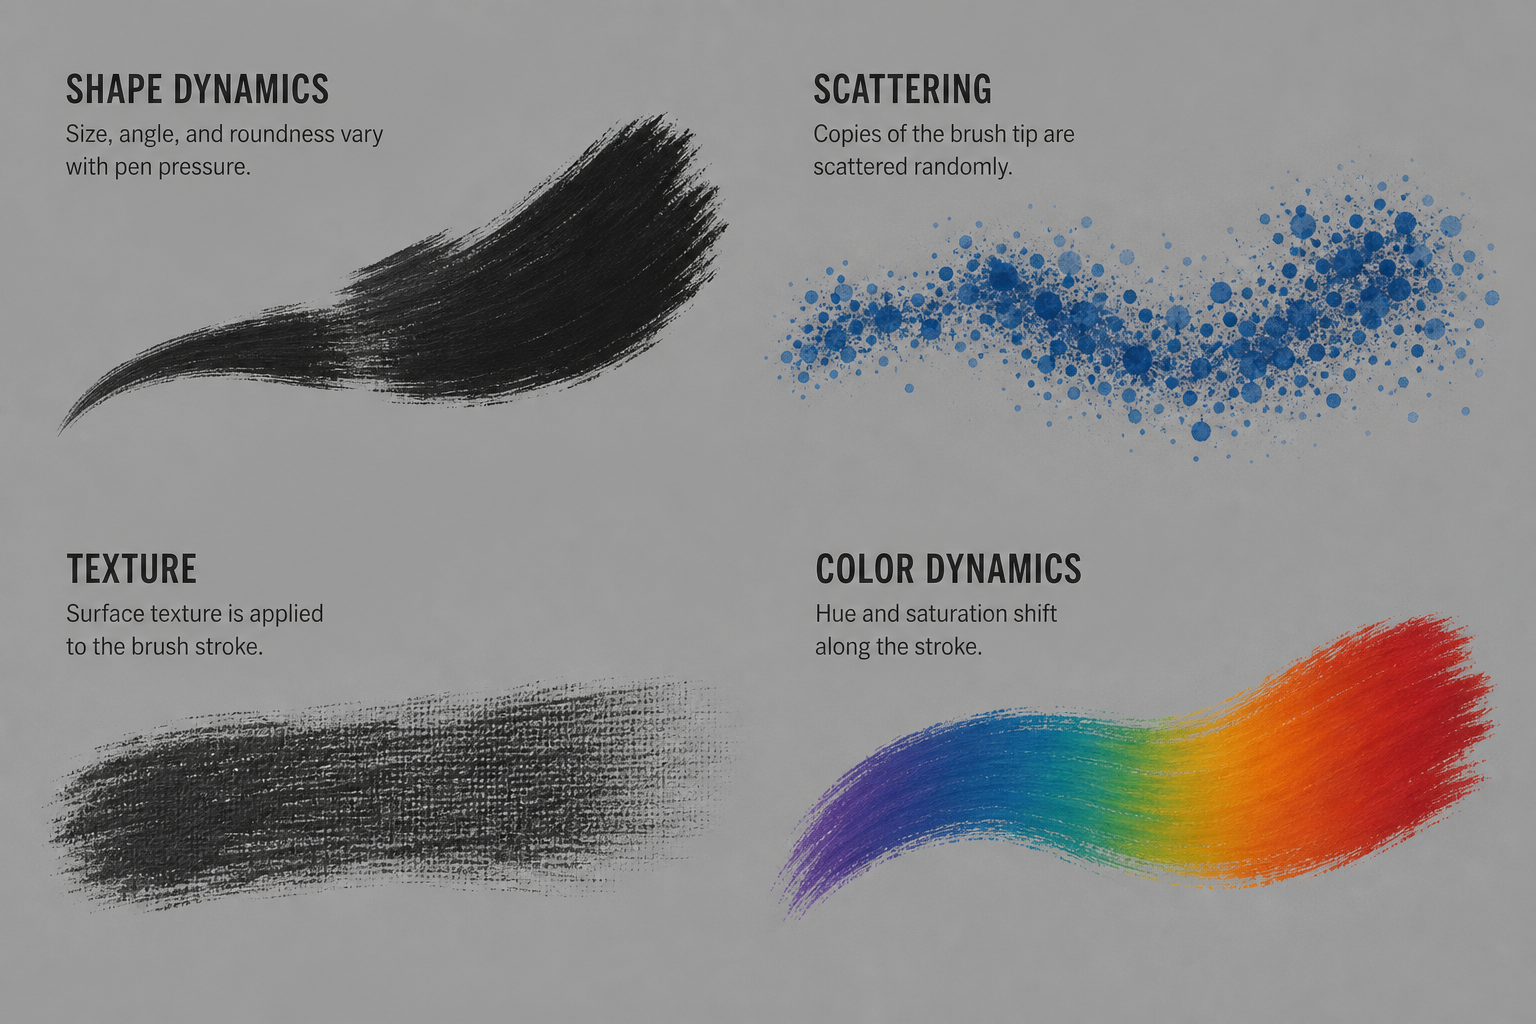
Shape dynamics is the most impactful category for natural-looking brush customization. It governs three axes of variation as you paint:
- Size Jitter — Randomly varies the tip size within the range you set. Set the Control drop-down to Pen Pressure and every push of a stylus creates a thicker stroke; ease off and it narrows.
- Angle Jitter — Rotates the tip randomly or based on pen tilt, direction of the stroke, or a fixed increment. Essential for leaf-scatter and hair brushes.
- Roundness Jitter — Squashes or stretches the tip ellipse, simulating a worn bristle or a calligraphy nib pressed at different angles.
- Flip X / Flip Y — Mirrors the tip horizontally or vertically on each stamp, breaking predictable repetition in texture fills.
For digital painters working with a Wacom or similar tablet, setting Size and Opacity controls to Pen Pressure inside Shape Dynamics and Transfer is the single most important step toward organic-looking linework.
Scattering: Add Randomness to Brush Strokes
Scattering distributes individual tip stamps around the stroke path rather than laying them neatly along it. Use it for particle effects, bokeh overlays, star fields, grunge textures, and foliage. The key sliders are:
- Scatter % — Controls how far stamps deviate from the stroke axis. Values above 500% create explosively wide scatter, ideal for galaxy or confetti effects.
- Both Axes — Ticking this box scatters stamps in every direction; unticked limits scatter perpendicular to the stroke.
- Count — Multiplies the number of stamps per spacing interval (1–16). Combine with scatter for dense cloud effects.
- Count Jitter — Varies the Count value randomly, producing uneven density that looks far more natural than uniform scattering.
A practical starting point for a sparkle effect: round brush tip at 15 px, Spacing 150%, Scatter 400% with Both Axes ticked, Count 4, Count Jitter 80%.
Texture: Give Brushes Physical Weight and Surface Character
Brush settings Photoshop veterans often overlook texture mapping — yet it’s what separates flat digital strokes from strokes that feel like they were made on physical media. The Texture category overlays a pattern onto every stamp of your brush tip.
- Pattern picker — Choose any loaded pattern. Photoshop ships with canvas, watercolour paper, rock, and grain textures; load more via the gear icon.
- Scale — Resize the pattern relative to your brush tip. Larger scale = coarser grain.
- Mode — The blend mode between tip and texture. Multiply darkens, Height creates a 3-D emboss look, and Subtract can produce etching-like results.
- Depth — How strongly the texture affects the stroke. At 0% the texture is invisible; at 100% the grain completely modulates opacity.
- Depth Jitter — Varies depth randomly per stamp, making the texture feel hand-applied rather than mechanically tiled.
Color Dynamics: Paint with Shifting Hues
Color Dynamics is the secret weapon for illustrators and concept artists. It randomly shifts the hue, saturation, and brightness of each stamp — making a single brush stroke appear to contain dozens of colours. Foreground/Background Jitter blends between your two active swatches, which lets you set a warm shadow colour and cool highlight colour and let Photoshop mix them naturally as you paint. Set Hue Jitter to 5–10% for subtle organic colour variation; push it to 30%+ for psychedelic or impressionistic work.
Transfer and Other Advanced Brush Settings
The Transfer category (previously called Other Dynamics) controls how opacity and flow vary along a stroke. When Control is set to Pen Pressure, light touches produce ghost-like, transparent marks while heavy pressure delivers full-density colour — exactly like a real ink brush or watercolour wash.
Other advanced options worth knowing:
- Dual Brush — Combines a second tip shape with your primary tip using a blend mode, creating complex organic shapes from two simple tips.
- Noise — Adds random pixel noise to the stroke edges, great for grunge, aged-photo, or film-grain effects.
- Wet Edges — Simulates watercolour by concentrating pigment at stroke edges and leaving a lighter centre.
- Build-up — Lets colour accumulate as you paint over the same area, mimicking the behaviour of the Airbrush tool on any brush type.
- Smoothing — Reduces jitter in stylus strokes, useful for clean curves in illustration work.
Saving and Organising Your Custom Brush Presets
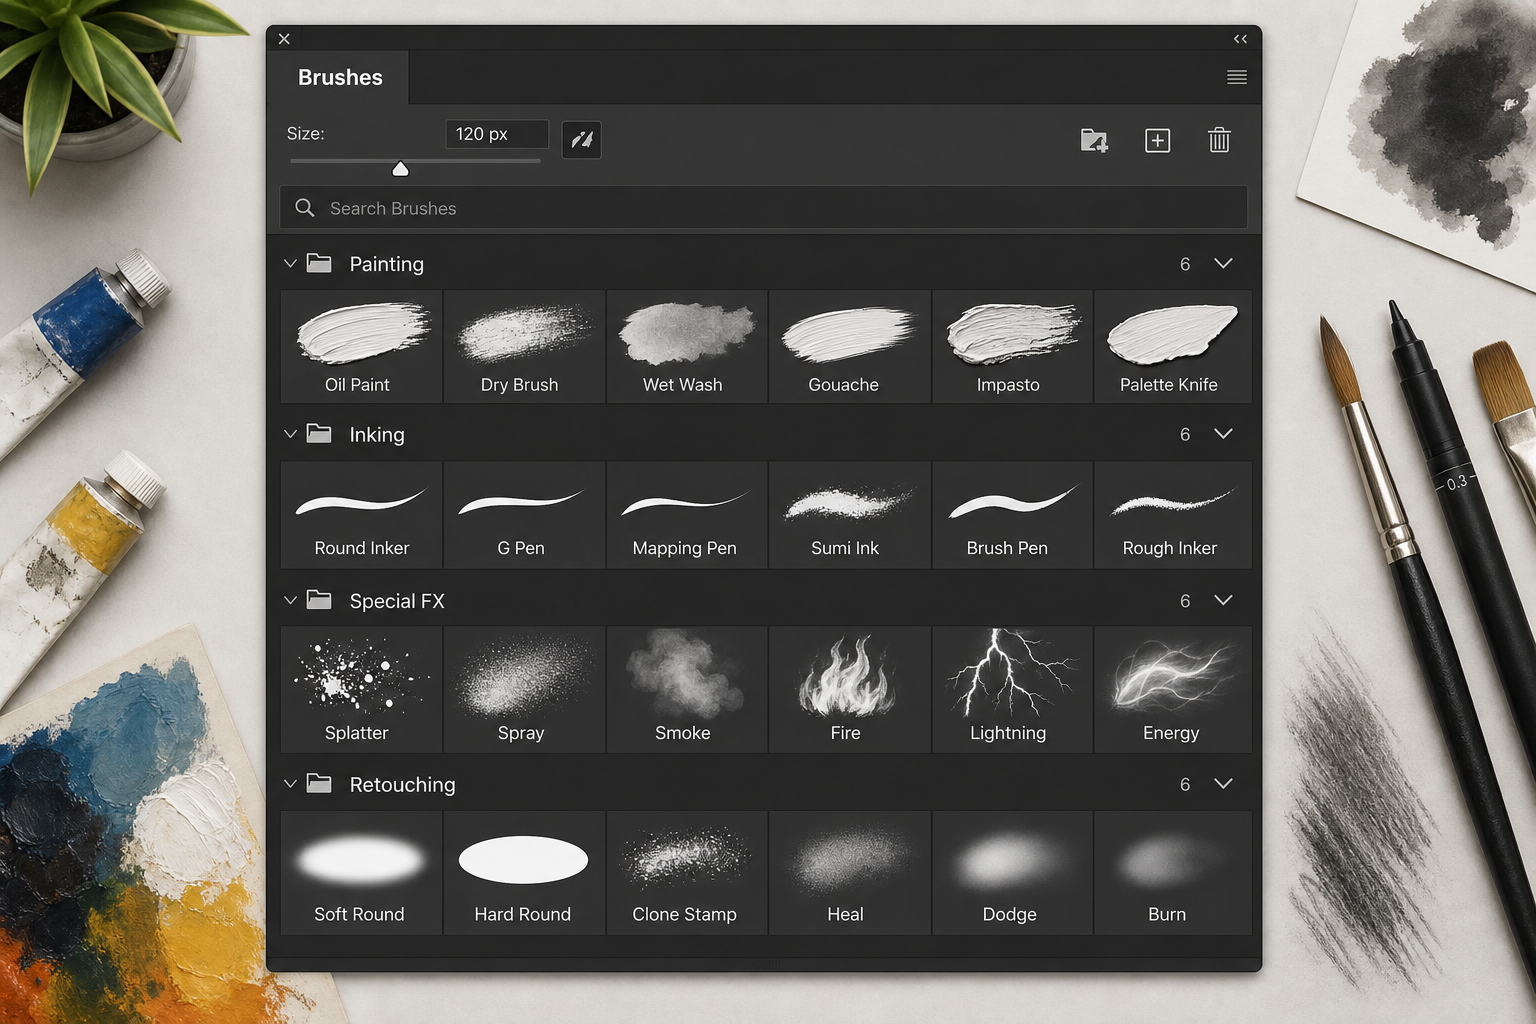
After perfecting your brush settings, save the preset by clicking the new-preset icon (floppy disk) at the bottom of the Brush Settings panel. Give it a descriptive name — “Watercolour Wash Soft Edge” is infinitely more useful than “Brush 47”. Group your presets into folders inside the Brushes panel (Window → Brushes) by clicking the folder icon. You can export any group as a standalone .abr file via Edit → Presets → Export/Import Presets, which makes it easy to back up your library or share it with collaborators.
Putting It All Together: Brush Customization for Different Workflows
Understanding individual settings is only half the story — knowing which combinations serve which creative task is what makes a truly skilled Photoshop user.
- Digital painting: Shape Dynamics (Pen Pressure for Size and Angle), Transfer (Pen Pressure for Opacity and Flow), a light Texture at Multiply mode. Result: responsive, painterly strokes that respond to hand pressure exactly like a traditional medium.
- Portrait retouching: Low Hardness, Spacing at 1%, Build-up disabled, Smoothing on. Keep brush settings minimal for soft, seamless skin work — you want control, not randomness.
- Special effects: High Scatter, Count up to 8, Color Dynamics with moderate Hue Jitter and Brightness Jitter, Noise ticked. Ideal for particle bursts, magic light, and starfields.
- Inking and line art: 100% Hardness, Spacing 1%, Shape Dynamics with Pen Pressure on Size only, Smoothing enabled. Produces crisp, expressive linework with natural taper.
Getting the Most from Adobe Creative Cloud for Brush Work
All of the custom Photoshop brushes techniques above require a licensed, up-to-date version of Photoshop. If you’re looking to get Photoshop at the best possible value, Top Key Shop stocks Photoshop licence keys as well as full Adobe Creative Cloud 1-year subscriptions at competitive prices, with fast email delivery and 24/7 customer support. Creative Cloud is especially worthwhile for brush artists because it bundles the complete Kyle T. Webster brush mega-pack — over 1,000 professional brushes — included at no extra cost.
Frequently Asked Questions
How do I open the Brush Settings panel in Photoshop?
Press F5 on your keyboard, or go to Window → Brush Settings. Alternatively, with a brush-based tool active, click the folder/settings icon in the Options bar at the top of the screen. The panel will dock wherever you position it in your workspace.
What file format do Photoshop brush presets use?
Photoshop brushes are stored as .abr files. Each file can contain multiple brush tips. You install them by double-clicking the .abr file while Photoshop is open, or via Edit → Presets → Preset Manager → Load. Photoshop CC 2020 and later also supports simply dragging an .abr file onto the open canvas.
Can I use brush settings with a mouse instead of a tablet?
Yes, but dynamics that rely on Pen Pressure (size, opacity, flow jitter) won’t respond — they’ll stay at a fixed value. Set the Control drop-down in Shape Dynamics and Transfer to “Off” or “Fade” instead of “Pen Pressure” for consistent results with a mouse. A graphics tablet dramatically improves brush customization results and is highly recommended for painting and illustration work.
How many brushes can Photoshop store?
There is no hard limit, but loading thousands of brushes simultaneously slows the Brushes panel and can impact performance. The best practice is to organise brushes into named groups and load only the sets relevant to your current project. Use Edit → Presets → Export/Import Presets to manage libraries efficiently.
Do brush settings affect the Eraser and Clone Stamp tools?
Yes. The Brush Settings panel applies to the Eraser, Clone Stamp, Healing Brush, Dodge, Burn, Blur, Sharpen, and Smudge tools — essentially any tool that uses a brush tip. This means you can apply scattering to the Eraser for a torn-paper edge effect, or add texture to Clone Stamp strokes for a more natural retouch.
What is the difference between Spacing and Scattering in Photoshop brush settings?
Spacing (found under Brush Tip Shape) controls how far apart individual tip stamps are placed along the stroke path — lower values create a continuous stroke, higher values create a dotted line. Scattering moves those stamps away from the stroke path in a random distribution. The two settings work together: use Spacing to control density, and Scattering to control how far stamps deviate from the painted line.
